Paint & TAP Play Date Tutorial
My friend is a watercolorist and has a group of friends she paints with.
We have been trying to get together so that I could teach them how to use TAP (Transfer Artist Paper) on paper with their watercolors. It isn't hard at all, they could figure it out on their own, but we wanted to have a play date, and show them something different than what they usually do. We finally settled on a date and time and today was the day, until 5 a.m. this morning. My daughter woke up with a stomach bug.
No fun for her!
And NO play date for me.
I feel terrible for all of us.
It couldn't be avoided.
So to make myself feel better
I thought I would have a play date with my blog readers.
Get out your supplies and let's play!
It couldn't be avoided.
So to make myself feel better
I thought I would have a play date with my blog readers.
Get out your supplies and let's play!
Materials Needed:
Watercolor or mixed media paper
Board or foam core larger than paper
painters tape
pencil
white gel roller pen
Sharpie or other markers
watercolor paints and watercolor brushes (you can use inexpensive kid's paints for this project if you don't have the "real" thing sitting around)
white acrylic paint or gesso
acrylic paint in whatever colors you would like to use (I used acrylic craft paints for these projects)
Foam brushes and/or acrylic brushes
stencils
newspaper
printed tissue paper (you can make your own by putting the tissue paper through your printer if you tape it to a piece of copy paper)
TAP - Transfer Artist Paper
Iron & ironing board
Iron & ironing board
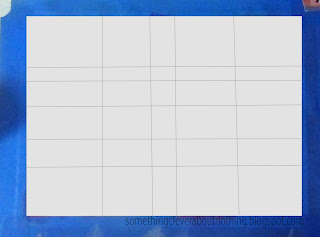
1. Start with a piece of watercolor paper or mixed media paper taped to a board or foam core, and draw light lines across the page. You don't have to use a ruler. This is a 9"x12" piece.
2. Fill in the squares with sloppy washes of watercolor paint.
4. Forgot to photograph it, but at this point this is a good time to mod podge some bits of tissue paper and newspaper to your painting. Sometimes I will mod podge first and then stencil, paint and draw and sometimes I do it the other way around.
5. Print an image onto your TAP paper (be sure to print images of people you know and words backwards). Please do NOT use a copyrighted image!!! This is a copy of my Mom's high school graduation photo - no copyright. My printer was printing with lots of lines but they weren't too terrible to use. There are so many great copyright free images online. A couple of my favorite sites are The Graphics Fairy and The NYPL Digital Collections.
The image will be fairly transparent when transferred but you can scratch into the TAP paper to create parts where the the paint and mod podged images will show through even more or to create more design.This is also a good time to add bits of bright color. I like using Sharpies, Crayola and other types of markers. Don't press too hard or you will scratch off some of the polymer that makes up the transfer.
6. Apply the TAP image to painted background according to directions in package.
Add more stenciling and markering over the top until you are satisfied.
This piece may still need more.
I would like a quote or phrase.
I'm not a big fan of my lettering abilities.
I need to work harder at that!
I'm not satisfied with the lettering on this piece:
Maybe if I asked really nice my friend Juliette
would do some calligraphy for me to add to my pieces.
I liked this piece but felt there was still something missing:
A couple of friends told me the images behind her face were distracting
so I added a wash of white
across her face and suddenly it is much better!
I could have added a wash of another more realistic skin color but I didn't have my acrylic paints handy and honestly it was 2 a.m. and I didn't want to go searching for my box of paints!
Most of my creating has been done very late lately.
Volleyball season ended for my daughter and then club season started earlier than I thought so I will be spending many, many hours a week driving and waiting for her. As a result I have been doing more drawing. Zentangling. I will share those later. Perhaps I should commit to practicing more lettering while I wait. Anyone have any great sites for all kinds of lettering practice?


Comments