Materials to make a Hand Carved Stamp - Part 1
Carving rubber stamps has been a lot of fun over the years but not as much as it has been this past month where I have carved every single day. Carving has been relaxing and challenging all at the same time. I feel as if I have stretched my creativity by exploring different materials and types of stamps. Someone asked how many stamps I created during Carve December and to be honest I am not exactly sure. At least 31! I know there were some days when I carved two, or four or maybe five stamps, so I'm sure it is closer to 40. I will have to go through and count them all. I have plenty more stamps to post still.
Another question I have been asked several times is "what are you using to make your stamps." I thought I would cover this question in two posts. This post will cover the basic materials and the second post will cover the types of rubber I used.
So first of all, the two things which have helped me most to create my own stamps were these books:
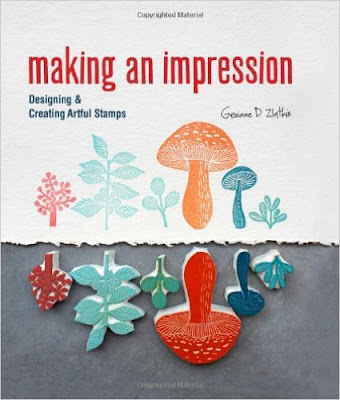
Making An Impression by Geninne Zlatkis
and Carve, Stamp, Play by Julie Fei-Fan Balzer

Both books show how to transfer an image and carve a lovely stamp. One of the most interesting things I learned from Geninne's book is to wash your carved stamp once you finish carving. This will remove all the little bits before you stamp. Funny how one little thing can make a difference in the final product. Of course there are plenty of other wonderful things in her book, including a lot of images that she encourages you to trace and use in making your own stamps. My friend, Juliette over at Chickpea Sewing Studio, has created a number of beautiful stamps like Geninne's.
I really enjoyed the step by step photos in Julie's book. I could have really used the pages describing how to use the the carving tool a few years ago. You would think it would be easy enough to figure out the carving tool, no photos required, however, I managed to shove the blade in the wrong way the first time I tried. When I tried to get the blade out I broke the blade in half! I called Speedball and the woman I spoke to was shocked. The metal blades are sturdy! But then again I bend every hand needle I use! Anyway, Speedball was kind enough to send me a new blade at no charge. God Bless Speedball! Julie also has lots of great tips on creating patterned and layered stamps.
My first stamp carving tool was the Speedball Linozip Safety Cutter set. I purchased this set before I had read either of the above books, and I wish I hadn't. (No link because I'm not recommending this set)

This set is designed for beginners, as you pull the blade toward you instead of digging it away. Perhaps this is safer with linoleum but with soft carving rubber, pushing is just as easy as pulling. I found myself making large lines and gouging out large pieces of rubber. I wasn't getting the delicate lines I had seen in other people's stamps. While at Juliette's I noticed she was using the Speedball Linoleum Cutter.

I wondered if my problem was in the blades, so I purchased a size 1 V blade (far left) and was amazed at the difference it made!


Another question I have been asked several times is "what are you using to make your stamps." I thought I would cover this question in two posts. This post will cover the basic materials and the second post will cover the types of rubber I used.
So first of all, the two things which have helped me most to create my own stamps were these books:
Making An Impression by Geninne Zlatkis

and Carve, Stamp, Play by Julie Fei-Fan Balzer

Both books show how to transfer an image and carve a lovely stamp. One of the most interesting things I learned from Geninne's book is to wash your carved stamp once you finish carving. This will remove all the little bits before you stamp. Funny how one little thing can make a difference in the final product. Of course there are plenty of other wonderful things in her book, including a lot of images that she encourages you to trace and use in making your own stamps. My friend, Juliette over at Chickpea Sewing Studio, has created a number of beautiful stamps like Geninne's.
I really enjoyed the step by step photos in Julie's book. I could have really used the pages describing how to use the the carving tool a few years ago. You would think it would be easy enough to figure out the carving tool, no photos required, however, I managed to shove the blade in the wrong way the first time I tried. When I tried to get the blade out I broke the blade in half! I called Speedball and the woman I spoke to was shocked. The metal blades are sturdy! But then again I bend every hand needle I use! Anyway, Speedball was kind enough to send me a new blade at no charge. God Bless Speedball! Julie also has lots of great tips on creating patterned and layered stamps.
My first stamp carving tool was the Speedball Linozip Safety Cutter set. I purchased this set before I had read either of the above books, and I wish I hadn't. (No link because I'm not recommending this set)

This set is designed for beginners, as you pull the blade toward you instead of digging it away. Perhaps this is safer with linoleum but with soft carving rubber, pushing is just as easy as pulling. I found myself making large lines and gouging out large pieces of rubber. I wasn't getting the delicate lines I had seen in other people's stamps. While at Juliette's I noticed she was using the Speedball Linoleum Cutter.

I wondered if my problem was in the blades, so I purchased a size 1 V blade (far left) and was amazed at the difference it made!

I was able to create tiny lines using this blade which helped to get more detail in the stamp. I also discovered I needed to use a lighter touch! Huge valleys aren't necessary to create a stamp!
Last year I ran into my local Dick Blick art store and noticed there was a set of Linoleum cutters from Blick that were on sale! Woohoo for sales! I grabbed them and made them my own.

The handle is just as sturdy as Speedballs but the jury is still out on the blades for me. I am having a hard time with them not being shiny! I think they cut the same as the Speedball blades, but they are rough in texture and it bothers me. It's a texture thing I suppose. I have loved having two handles though because I can keep my two favorite blades available all the time! Both linoleum cutter sets come with a knife blade but I really prefer using a Xacto knife for cutting away excess rubber.

I suppose in some ways this is my third handle with a blade. It is something I already owned so it wasn't an excess expense for me. If you don't own one, you don't need to buy one if you purchase the linoleum cutter set.
My next most important tool is a self healing cutting board. I have several sizes but since I was carting my stamping things out of the studio, so that I could carve while watching TV with the family, I used my little 5x5" mat from June Taylor. Mine is gray, but I guess they are blue now. Anything you can use to keep from cutting up your table will work. I only needed it when slicing up the rubber into smaller pieces or when trimming away excess edges. I know some people like to use a piece of glass under their rubber for carving.

A couple of mini quilting rulers were also very handy to have on hand for measuring, and using as a straight edge when cutting up the rubber. I was grateful for these 3 1/2" square and 1x6" rulers.


And in order to draw and/or transfer your images you will need a pencil, preferably one with soft lead if you are transferring the image. A softer lead, as in a 4B graphite pencil, will put more graphite onto the paper and make the image transfer easier. If you are drawing directly onto the rubber you can use anything that leaves a mark on the rubber.

I will cover all the carving materials I tried during Carve December in my next post, and give my opinion on each one. If you don't want to miss this post you can sign up to receive all my blog posts by email using the little gadget in the right hand column.


Comments